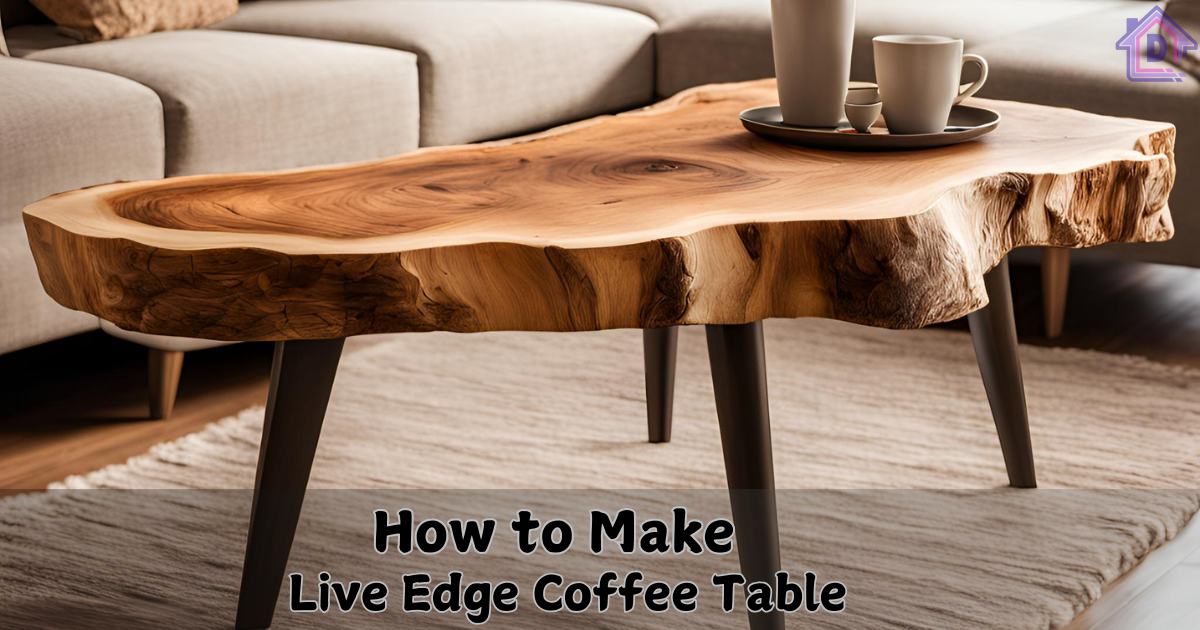
Crafting a live edge coffee table is a rewarding project that adds a touch of nature to your living area. This guide provides a detailed approach to how to make a live edge coffee table that’s not just beautiful but also functional. Regardless of your woodworking experience, you can follow these steps to create an eye-catching centrepiece for your home.
The Appeal of a Live Edge Coffee Table
There are many reasons to love live edge coffee tables:
- Unique Design: Each table features a different shape and grain, ensuring that your piece is unlike any other.
- Natural Beauty: They bring a rustic charm and warmth to your living space.
- Durability: When made from solid hardwood, these tables can last for many years.
Materials You Will Need
To create your live edge coffee table, gather the following materials:
- A live edge wood slab (preferably hardwood like walnut, cherry, or maple)
- Epoxy resin (for filling any gaps or cracks)
- Table legs (either metal or wooden)
- Sandpaper (various grits)
- A finish (such as oil, varnish, or polyurethane)
- Wood glue
- Clamps
- Safety equipment (gloves and dust mask)
Required Tools
You will also need these tools for the project:
- Circular saw or jigsaw
- Router (for shaping edges)
- Sander (an orbital sander is best)
- Drill and drill bits
- Measuring tape
- Level
- Applicator for finish (brush or cloth)
Step-by-Step Process
Step 1: Choose Your Wood
Start by selecting a beautiful live edge slab. Look for one with interesting grain patterns and a distinctive edge. Inspect the slab for any cracks or imperfections that may need attention.
Step 2: Cutting the Wood to Size
After selecting your wood, measure and mark the dimensions you want for your table. Carefully cut the slab using a circular saw or jigsaw. If you’re uncertain about cutting it yourself, consider asking for help at your local lumberyard.
Step 3: Smoothing the Surface
Once your slab is cut, it’s time to sand the surface. Begin with coarse sandpaper (around 80 grit) to eliminate rough spots. Progressively switch to finer grits (up to 220 grit) for a polished finish. Sand should always be applied against the grain.
Step 4: Filling Cracks with Epoxy (If Needed)
If your slab has any cracks, you can fill them with epoxy resin. Carefully follow the instructions on the epoxy package for mixing and pouring it into the gaps. Allow the resin to cure completely before moving on to the next steps.
Step 5: Shaping the Edges
Shape your table’s edges with a router to achieve a more sophisticated appearance.You can select a simple roundover style or a more intricate profile. This adds an elegant touch to your finished piece.
Step 6: Applying the Finish
The finish you choose for your live edge coffee table is crucial for its appearance and durability. Options include natural oils for a matte look or varnish for a glossy finish. Apply your chosen finish using a brush or cloth and follow the manufacturer’s instructions. Allow it to dry thoroughly, and consider sanding lightly between coats for a smoother texture.
Step 7: Attaching the Legs
With the table surface prepared, it’s time to attach the legs. Depending on the type of legs you’ve chosen, secure them to the underside of the table using screws or brackets. Be sure to use a level to ensure that your table stands evenly.
Step 8: Final Adjustments
Inspect your completed table for any rough patches or areas that need additional sanding or finishing. Once everything looks perfect, your table is ready to enhance your space!
Creative Ideas for Live Edge Coffee Tables
Here are some inspiring ideas:
- Glass Top: Consider adding a glass top to highlight the wood underneath.
- Mixed Materials: Combine wood with metal accents for a modern twist.
- Custom Staining: Use stains to achieve a specific color that complements your décor.
- Natural Finish: Opt for a raw finish to keep the organic feel of the wood.
Frequently Asked Questions
1. What is the approximate cost of making it?
The cost can vary significantly based on the type of wood and materials used, generally ranging from $200 to $800.
2. What finish is best for a live edge coffee table?
Your choice of finish depends on your aesthetic preference. Oil finishes give a natural appearance, while varnishes are more durable. Choose the one that best suits your style.
3. How should I maintain it?
For maintenance, regularly wipe it down with a damp cloth. Avoid harsh chemicals and reapply the finish as necessary to preserve its look.
4. Is it possible to use epoxy on a live edge coffee table?
Absolutely! Epoxy is perfect for filling gaps and strengthening the table construction. Just ensure you adhere to the application guidelines provided by the manufacturer.
5. How can I build it myself?
To build one, start by selecting your wood slab, cutting it to the desired size, and finishing it with your choice of finish. Attach legs for stability, and you’ll have a stunning table to enjoy.
Conclusion
Now you have a complete guide on how to make a live edge coffee table that will be a beautiful addition to your home. This project allows you to showcase your creativity and craftsmanship while producing a functional piece that highlights the beauty of natural wood. Whether you opt for a rustic or modern aesthetic, your live edge coffee table is sure to impress. Follow these steps, and enjoy creating a one-of-a-kind piece that reflects your style!


